Overview
Redact mode lets you hide sensitive content in your videos by applying blur, pixelation, or solid colour overlays to specific regions. Common use cases include:
- Privacy protection — Blur faces of bystanders or minors in public footage
- License plates — Obscure vehicle registration numbers for privacy compliance
- Sensitive text — Hide personal information, addresses, or confidential documents
- Logos and branding — Cover logos or trademarks you don’t have rights to display

Entering Redact Mode
Click the Redact segment in the mode selector at the top of the window to enter redact mode.
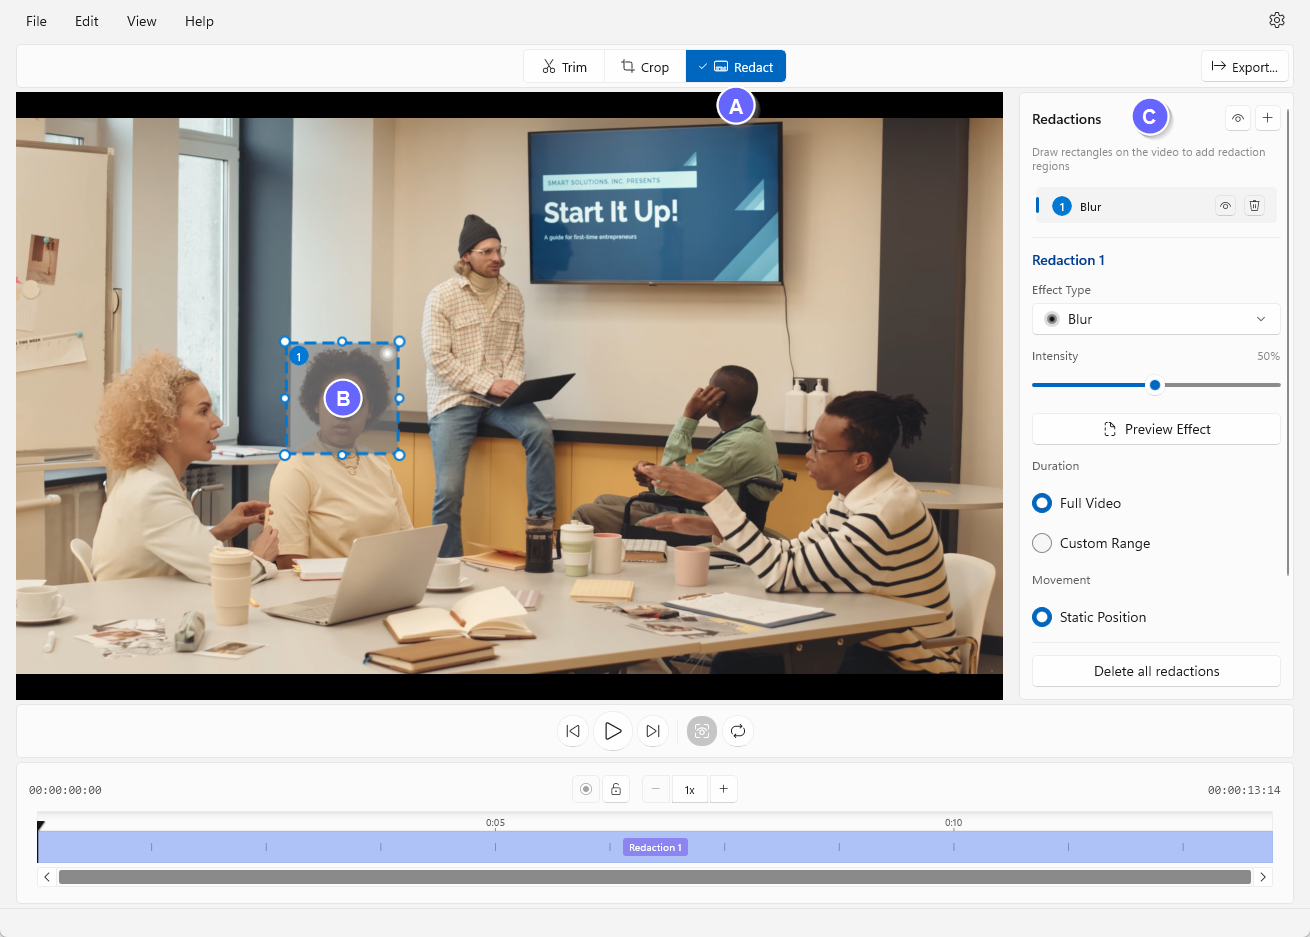
- A - Redact mode button (click to enter redact mode)
- B - Redaction overlay (shows what will be hidden)
- C - Redaction settings panel (adjust type, intensity, and timing)
Adding a Redaction
There are two ways to create a new redaction region:
Method 1: Draw on the Video
The quickest way to add a redaction:
- Click and drag anywhere on the video preview
- A new redaction region appears as you drag
- Release to confirm the region
- The redaction is automatically selected for editing
Method 2: Use the Add Button
For a more controlled approach:
- Click the + button in the redaction settings panel header
- A new redaction region appears in the centre of the video
- Drag the region to reposition it
- Drag the corners or edges to resize
Redaction Types
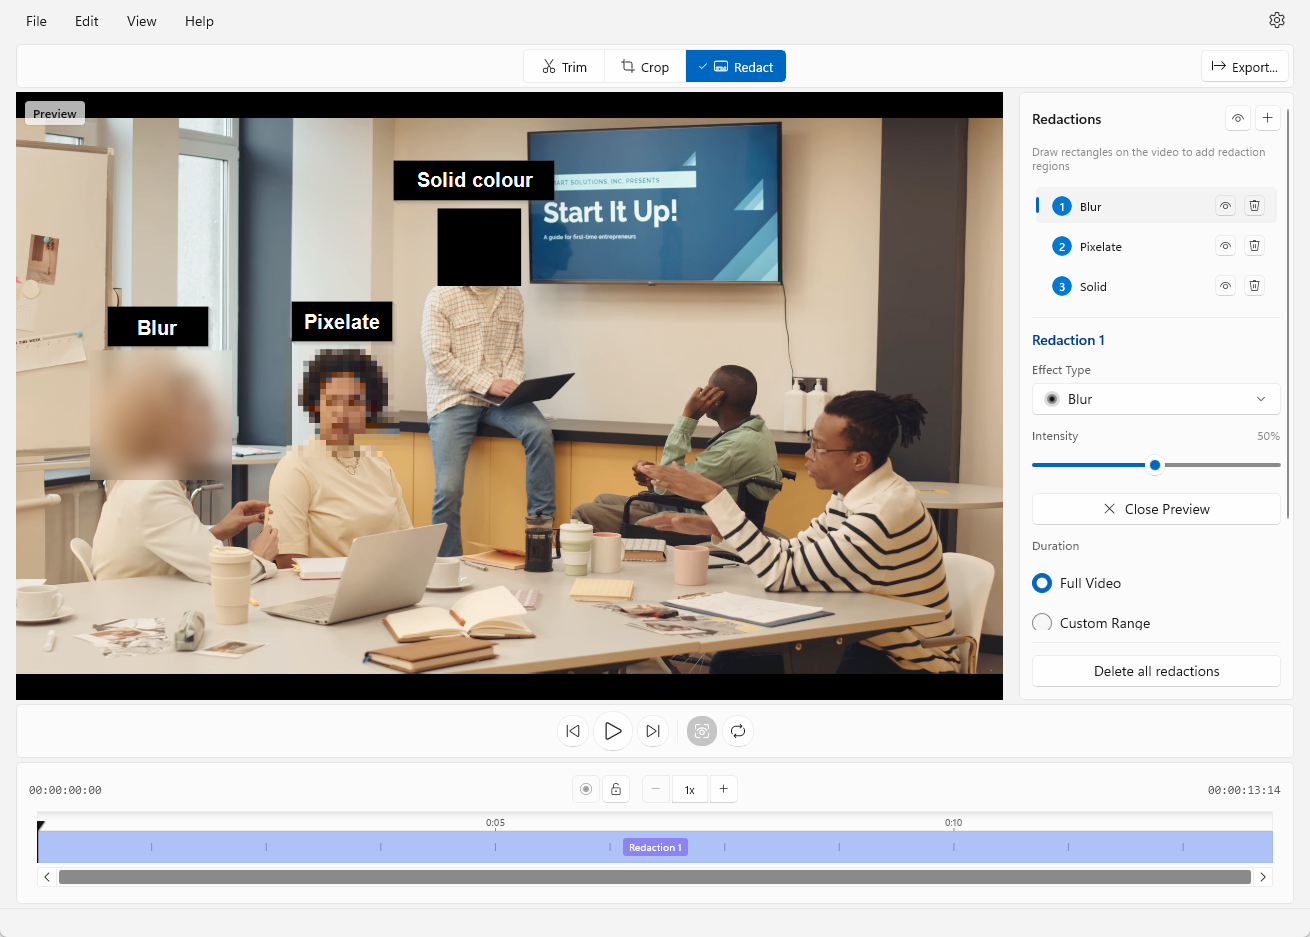
SnapTrim offers three types of redaction effects. Select the type from the Effect Type dropdown in the settings panel.
| Type | Description |
|---|---|
| Blur | Gaussian blur that obscures content while preserving general shapes. Best for faces and text. |
| Pixelate | Mosaic effect that reduces resolution. Creates a distinctive “censored” look. |
| Solid Colour | Completely covers the region with a solid colour. Maximum privacy protection. |
Adjusting Intensity
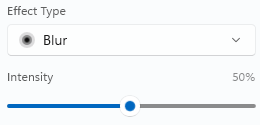
For Blur and Pixelate effects, use the Intensity slider to control the strength of the effect:
- Low values (1-30%) — Subtle effect, some details may remain visible
- Medium values (30-70%) — Good balance of obscuring content while maintaining context
- High values (70-100%) — Strong effect, content is completely unrecognisable
The current intensity percentage is displayed next to the slider.
For Solid Colour redactions, choose a fill colour from the Fill Colour dropdown instead:
- Black (default)
- White
- Grey
- Red
Static Redactions
By default, redactions stay in a fixed position throughout the video — this is called Static Position mode.
Duration Options
Under the Duration setting, you can control when the redaction is active:
| Option | Behaviour |
|---|---|
| Full Video | Redaction is visible for the entire video duration |
| Custom Range | Redaction only appears between specific start and end times |
Setting a Custom Time Range
When Custom Range is selected:
- The Start and End time inputs become visible
- Enter times in HH:MM:SS:FF format (hours:minutes:seconds:frames)
- Use the Set to Playhead buttons (arrow icons) to quickly set times to the current playback position
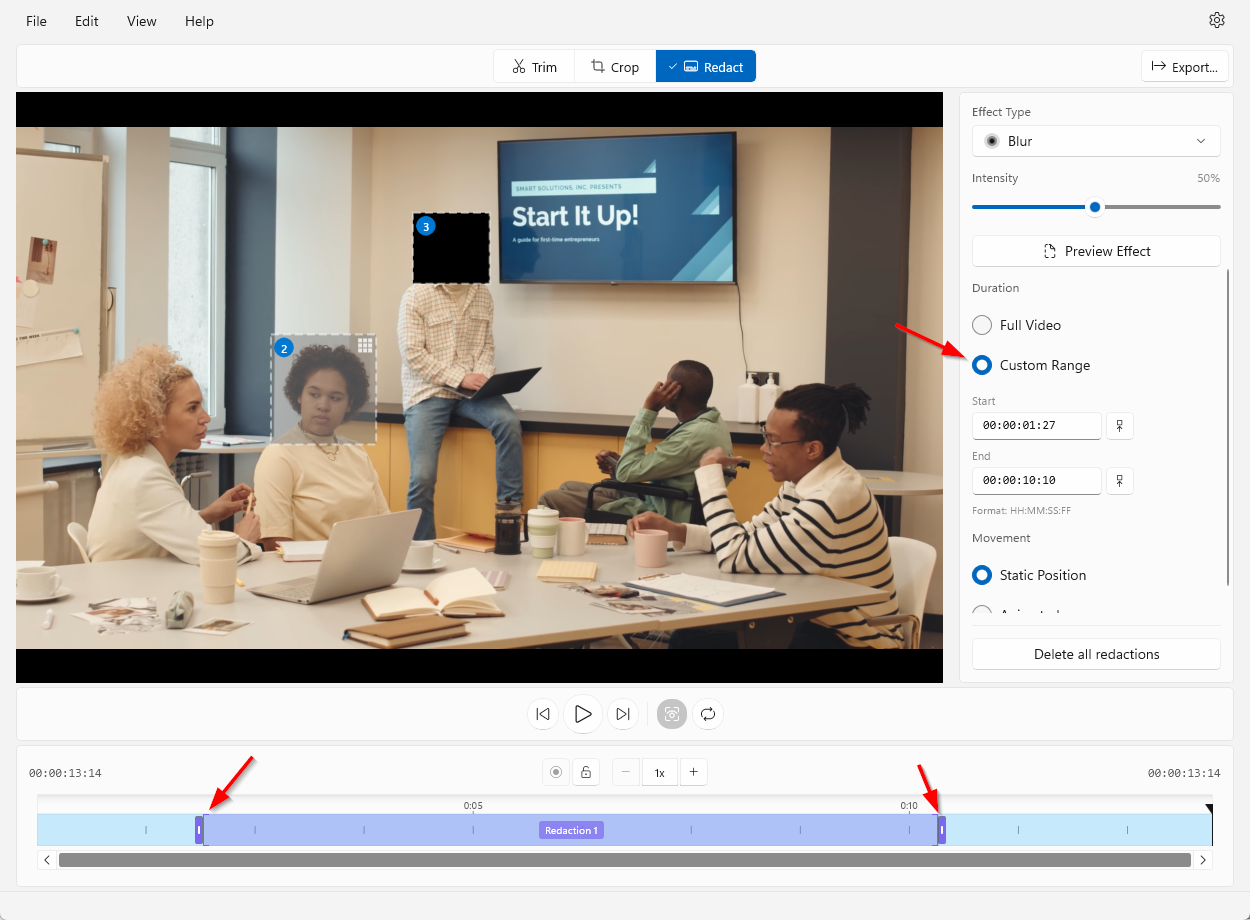
This is useful when sensitive content only appears for part of the video — for example, a person walking through frame or a document briefly shown on screen.
Animated Redactions
For moving subjects (like a person walking or a car driving past), static redactions won’t work. Animated mode lets you track movement by setting multiple keyframes.
How Keyframes Work
A keyframe records the redaction’s position at a specific moment in time. SnapTrim smoothly interpolates the position between keyframes, creating fluid motion tracking.
- Single keyframe = static position (same as static mode)
- Multiple keyframes = animated movement between positions
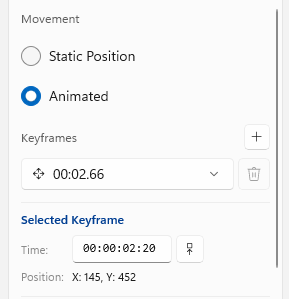
Enabling Animated Mode
- Under the Movement setting, select Animated
- The Keyframes section appears below
Adding Keyframes
- Scrub to the position in the video where you want to record the redaction’s location
- Reposition and/or resize the redaction region on the video preview
- Click the + button next to Keyframes to add a keyframe at the current playhead position
Repeat this process at regular intervals throughout the movement. For smooth tracking:
- Add keyframes every 1-2 seconds for slow movement
- Add keyframes every 0.5-1 seconds for fast movement
- Add extra keyframes when the subject changes direction
You will see a dashed line appear along the path the redaction will move. This will help you visualise the path of the region through the keyframe positions you’ve defined. If you play the video you will also be able to see the region move in real time.
Managing Keyframes
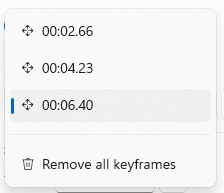
The Keyframes dropdown shows all keyframes for the selected redaction:
- Select a keyframe to view and edit its details
- The selected keyframe shows its Time and Position in the panel below
- Use the Set to Playhead button to adjust the keyframe’s timestamp, or enter a time value in the input field
- Drag or resize the region’s overlay with any keyframe selected to update its position at that time
- Click the Delete button (bin icon) to remove the selected keyframe
- Click the Duplicate button to create a copy of the selected keyframe
Keyframe Scaling
Redactions can change size between keyframes, allowing you to track objects that grow or shrink over time:
- Per-keyframe sizing — Resize a redaction at a specific keyframe to set that keyframe’s size
- Smooth interpolation — Size transitions smoothly between keyframes in both preview and export
- Combined animation — Position and scale can be animated together on the same keyframe
- Visual indicator — A resize icon appears next to keyframes in the dropdown when size changes are recorded
This is useful for tracking subjects that move towards or away from the camera, such as a person walking closer or a vehicle driving into the distance.
Keyframe Markers on the Timeline
When a redaction is selected, its keyframes appear as markers on the timeline. You can:
- Click a marker to jump to that keyframe’s position
- Easily see the distribution of keyframes across the video

Real-Time Preview
All redaction effects — blur, pixelate, and solid colour — render live on the video as you work. You can see exactly how your redactions will look in the final export without any extra steps:
- Adjust intensity and see the result update immediately on the video
- Reposition or resize a region and the effect follows in real time
- Scrub the timeline to check how redactions look across different frames
- Play the video to verify animated redactions track correctly
This real-time preview applies to all effect types and works whether the video is paused or playing.
Managing Multiple Redactions
You can add multiple redaction regions to a single video — useful when there are several items to hide (e.g., multiple faces in a crowd).
The Redaction List
All redactions appear in the list at the top of the settings panel. Each entry shows:
- Number badge — Identifies the redaction (matches the badge on the video overlay)
- Type label — Shows the effect type (Blur, Pixelate, or Solid Colour)
- Visibility toggle — Eye icon to show/hide the overlay in the editor
- Delete button — Bin icon to remove the redaction

Selecting Redactions
Click a redaction in the list to select it. The selected redaction:
- Displays a highlighted border on the video preview
- Shows its settings in the panel below the list
- Can be repositioned or resized
You can also click directly on a redaction overlay in the video preview to select it.
Visibility Toggle
Click the eye icon to toggle a redaction’s visibility in the editor. This is useful when:
- You have overlapping redactions and need to work on one underneath
- You want to temporarily see the unredacted content to verify positioning
Important: Hidden redactions are still applied when you export — this only affects the editor preview.
Deleting Redactions
- Click the bin icon next to a redaction in the list to delete it
- Click Clear All at the bottom of the panel to remove all redactions
Copying and Pasting Redactions
You can duplicate redactions using familiar keyboard shortcuts:
- Ctrl+C — Copy the selected redaction to the clipboard
- Ctrl+V — Paste a copy of the redaction (offset 15 pixels down-right from the original)
- Ctrl+Z — Undo paste operations
Copy and Paste are also available from the Edit menu.
This is useful for:
- Creating multiple redactions with similar properties
- Duplicating a complex animated redaction to cover multiple objects
- Quickly adding redactions in a grid pattern for repeated elements
Tips
- Combine with trimming and cropping — Set your redactions first, then switch to Trim or Crop mode. All adjustments apply together when you export
- Re-encoding required — Like cropping, redaction requires the video to be re-encoded. Export times will be longer than a lossless trim, but SnapTrim uses high-quality settings to minimise quality loss
- Use real-time preview to verify — Adjust blur/pixelate intensity and check the live preview on the video before exporting
- For moving objects — Add keyframes at regular intervals and whenever the subject changes speed or direction
- Test short clips first — If you’re unsure about settings, trim to a short section containing the redaction, export it, and review before processing the full video
What’s Next?
- Exporting Videos — Save your redacted video
- Trimming Videos — Trim the start or end from your video
- Cropping Videos — Resize and reframe your videos