Overview
Crop mode lets you resize and reframe your videos by selecting a specific region to keep. Common use cases include:
- Removing black bars — Strip letterboxing or pillarboxing from videos
- Social media formats — Convert landscape videos to square (1:1) or portrait (9:16) for Instagram, TikTok, and Reels
- Reframing subjects — Focus on a specific area of the frame, such as centring a speaker or removing distracting elements
Entering Crop Mode
Click the Crop segment in the mode selector at the top of the window to enter crop mode.

- A - Crop mode button (click to enter crop mode)
- B - Crop region overlay (shows what will be kept)
- C - Crop controls panel (adjust dimensions and aspect ratio)
Setting Your Crop Region
There are three ways to define your crop area:
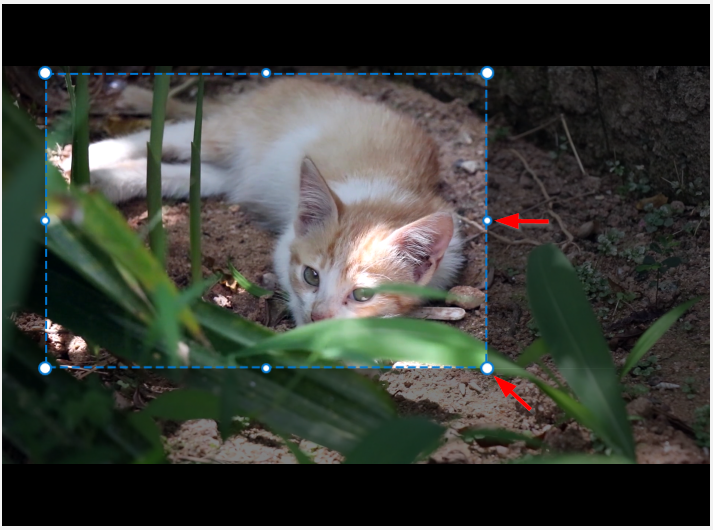
Method 1: Drag the Crop Handles
The quickest way to set your crop region:
- Corner handles — Drag any of the four corners to resize diagonally
- Edge handles — Drag the top, bottom, left, or right edges to resize in one direction
- The darkened areas outside the crop box show what will be removed
Method 2: Use the Numeric Inputs
For precise control over your crop dimensions:
- X — Horizontal position of the crop region’s left edge
- Y — Vertical position of the crop region’s top edge
- Width — Width of the crop region in pixels
- Height — Height of the crop region in pixels
Use the arrow keys while focused on a numeric field for fine-tuning in single-pixel increments.
Method 3: Move the Entire Region
To reposition the crop box without changing its size:
- Click and drag inside the crop region
- The entire box moves with your cursor
- Release to set the new position
This is useful when you’ve got the right dimensions but need to centre the subject.
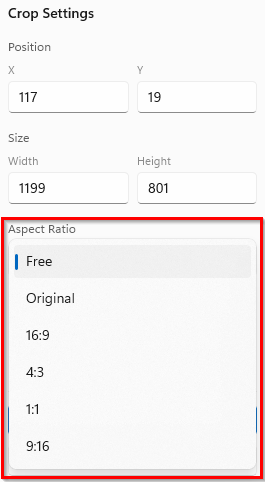
Aspect Ratio Presets
Select a preset from the Aspect Ratio dropdown to constrain your crop to a specific shape:
| Preset | Ratio | Use Case |
|---|---|---|
| Free | — | Freeform cropping with no constraints |
| Original | Varies | Match the source video’s aspect ratio |
| 16:9 | Widescreen | YouTube, standard HD video |
| 4:3 | Standard | Classic TV format |
| 1:1 | Square | Instagram feed posts |
| 9:16 | Portrait | TikTok, Instagram Reels, YouTube Shorts |
When an aspect ratio is locked, dragging any handle will maintain the selected proportions.
Previewing Your Crop
The crop overlay provides instant visual feedback:
- Darkened areas — Portions outside the crop region are dimmed to show what will be removed
- Dashed border — The active crop region is outlined with a dashed line
- Video preview — Play the video at any time to see how your crop looks in motion
Applying the Crop
SnapTrim uses a two-state workflow for cropping, just like trimming:
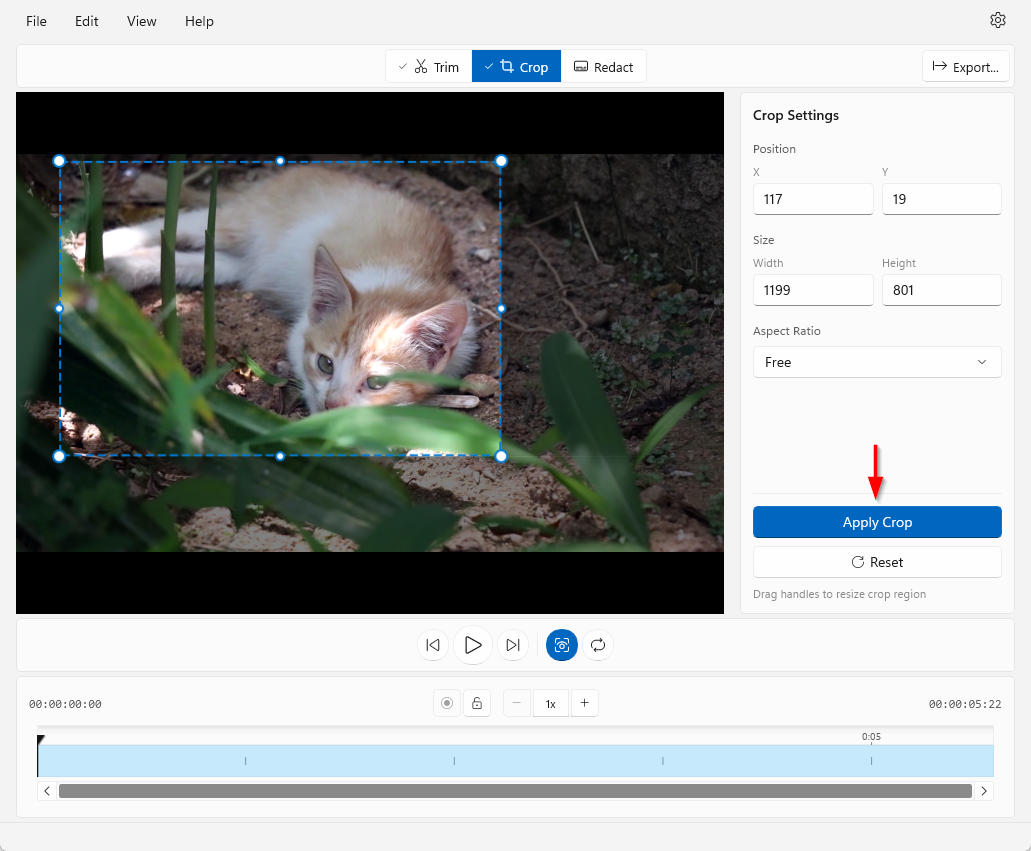
- Apply — Click to lock in your crop settings; the preview updates to show only the cropped region (changes into the Edit button after applying)
- Edit — Returns to adjustment mode so you can modify the crop
- Cancel — Discards your edits and restores the previously applied state (or press Escape)
- Reset — Clears all crop settings and returns to the full frame
Note: You can freely switch between Apply and Edit modes — nothing is permanent until you export. The Cancel button and Escape shortcut only appear when editing a previously applied crop.
Tips
- Combine with trimming — Set your crop first, then switch to Trim mode to cut the length; both adjustments will be applied when you export
- Re-encoding required — Unlike trimming, cropping requires the video to be re-encoded. SnapTrim uses high-quality CRF settings to minimise quality loss, but the export will take longer than a lossless trim
- Fine-tune with arrow keys — Click a numeric input field and use the up/down arrow keys for single-pixel adjustments
- Check motion — Play through the video after setting your crop to ensure moving subjects stay within the frame
What’s Next?
- Exporting Videos — Save your cropped video
- Trimming Videos — Remove unwanted sections from your video